No-bake chocolate peanut butter squares, vegan and gluten free by Suzanne

no-bake chocolate peanut butter squares

My mother, a school teacher by profession, was a wonderful baker who baked regularly, in cool weather and in warm. At some point, she put a second oven in an unfinished room in the basement of our family home, which allowed her to bake molasses cookies, cinnamon rolls or blueberry pies on hot summer days and for the rest of house to remain cool.

We don’t have a second oven in our basement but I do have this dessert recipe that’s great to make no matter the temperature but especially great if you are craving a yummy dessert that requires no baking.

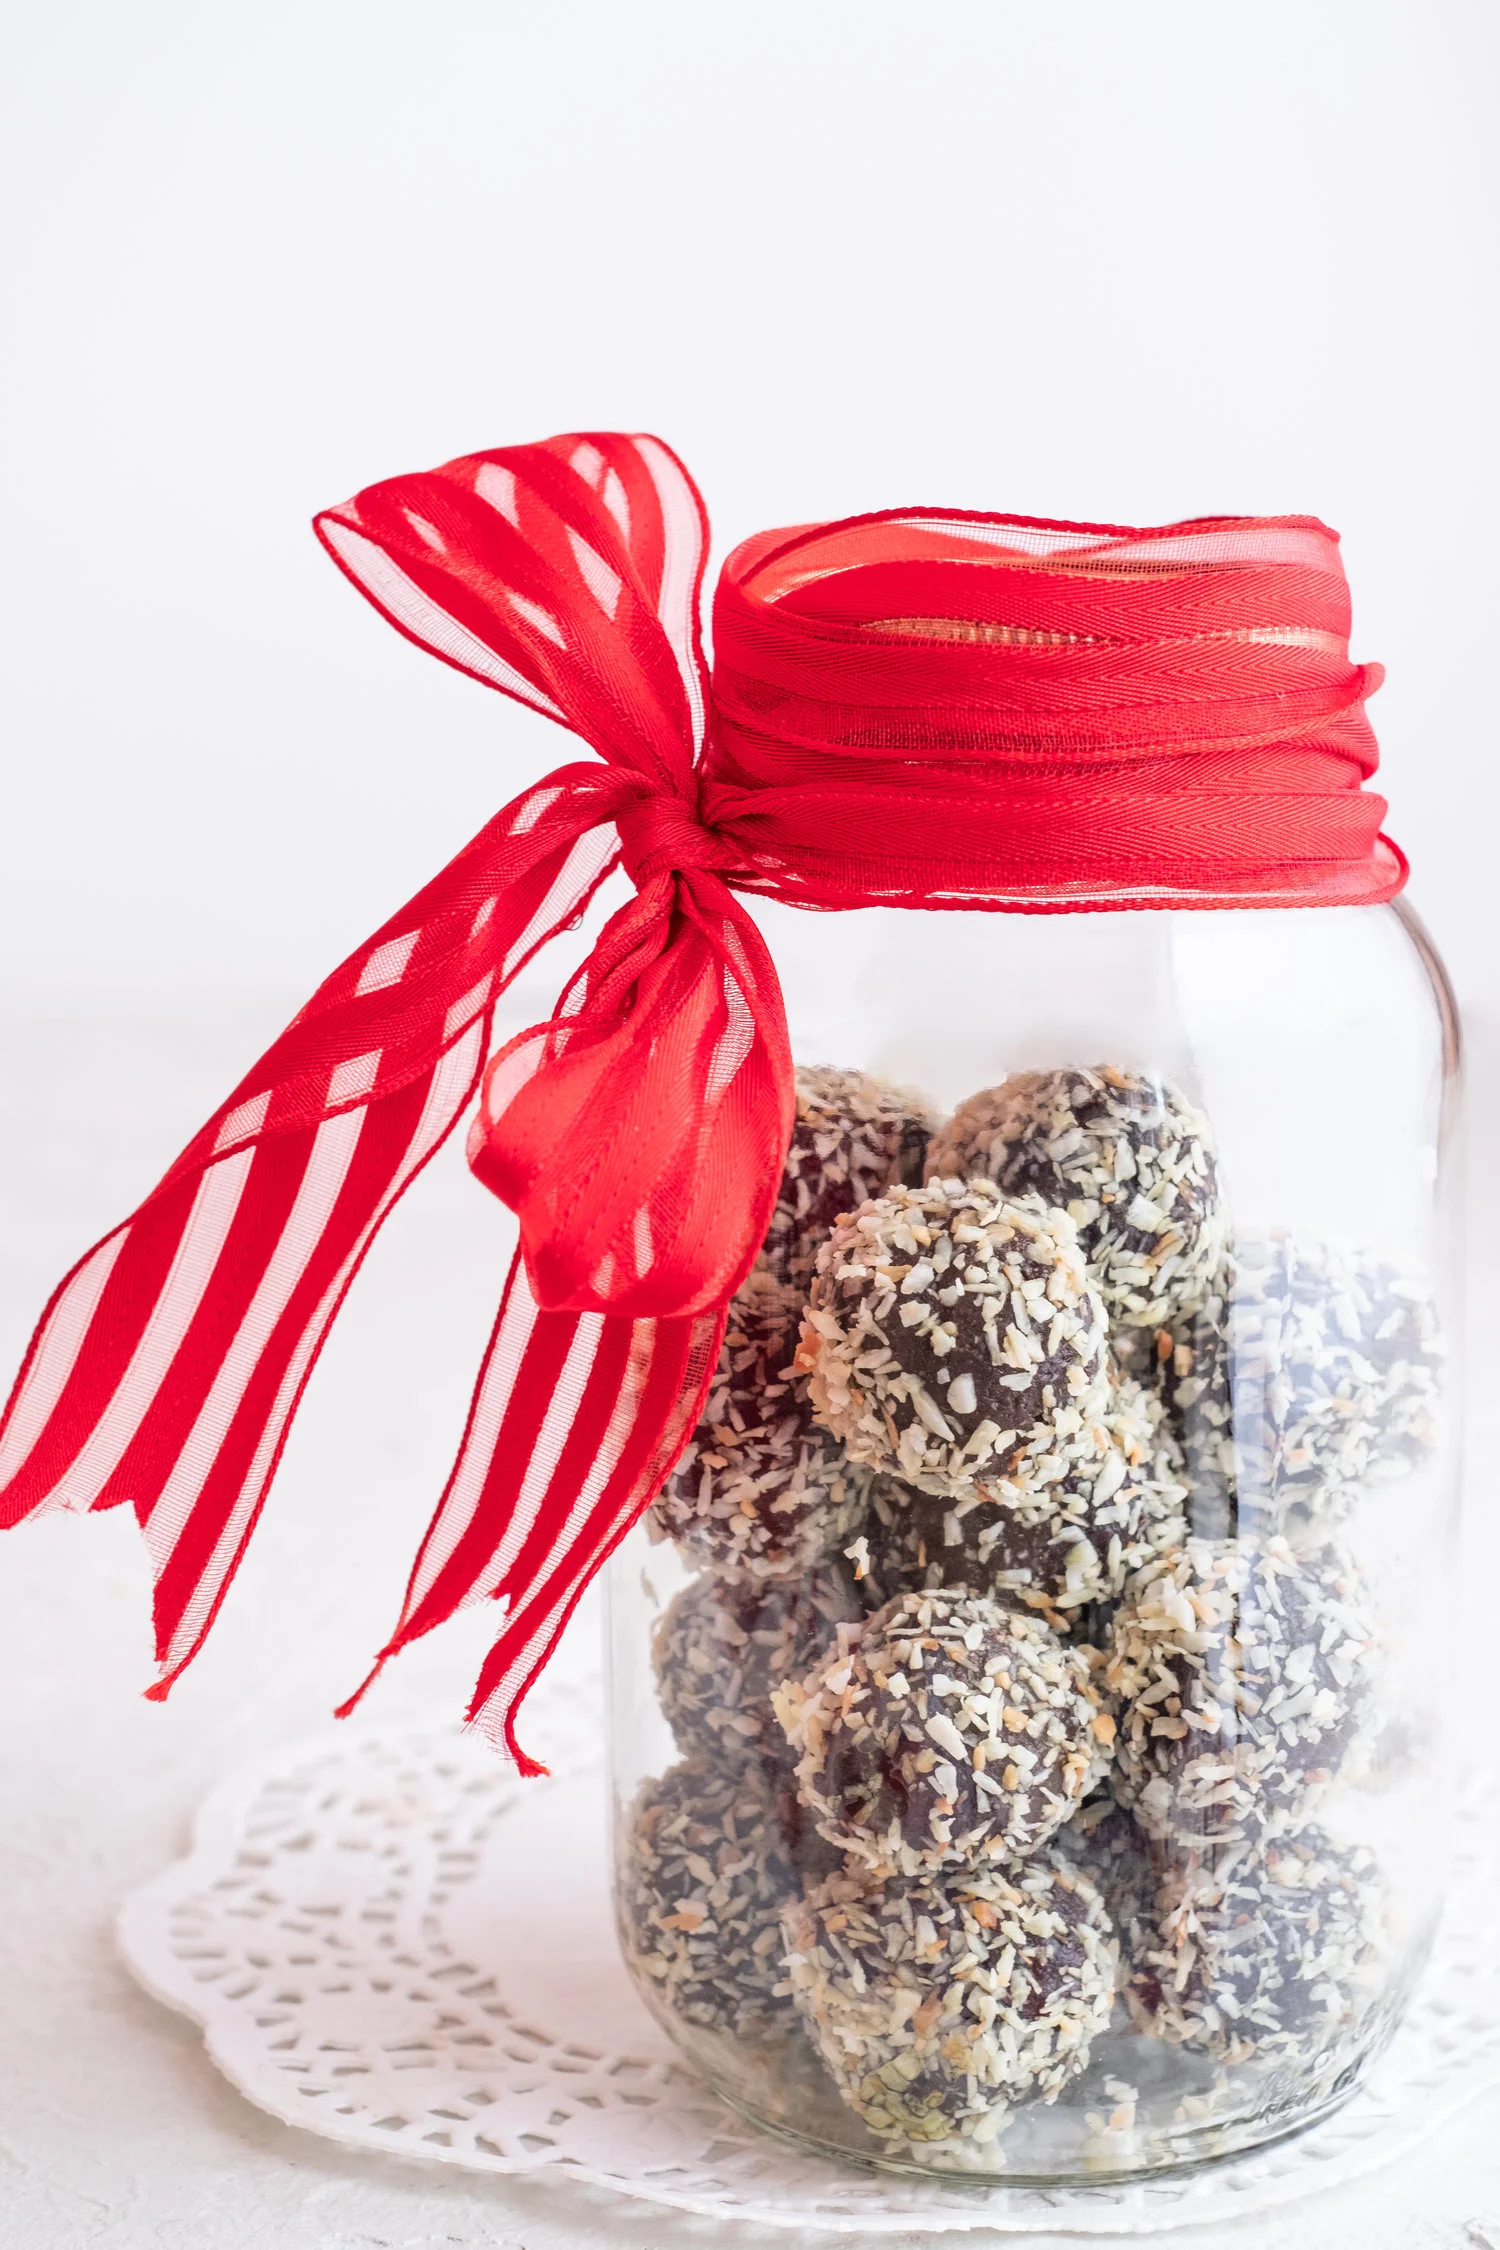
These no-bake squares are also the perfect package to deliver the winning combination of chocolate and peanut butter. They take no more than 15 minutes of prep time and they’re nourishing too. Especially if you select quality ingredients.

chocolate peanut butter squares, vegan

The base is made in the food processor with oats, dates, peanut butter and salt. I use lovely soft medjool dates and a wholesome peanut butter that’s a little on the runny side. I use large rolled oats but quick oats do the trick as well. If your dates are especially dry you might soak them for a bit in warm water. Otherwise, your base mixture might be dry and crumbly.

The top layer is made of gently melted chocolate (semi sweet, bitter sweet, milk or the dark stuff) and a bit of peanut butter.

I’ve also included a simple method for making your own chocolate using cocoa powder, maple syrup and cocoa butter. It’s divine and super easy to make.

chocolate peanut butter squares, vegan

No-bake chocolate peanut butter squares

Adapted from and inspired by this recipe.

Base:

2 cups old fashioned or quick oats

1 cup pitted soft dates, packed (if hard and tough soak in warm water and then drain)

1 cup peanut butter

1/4 tsp salt (or more to taste)

1 tsp vanilla extract

Line a 8 x 8 pan with enough parchment so you can easily lift the squares out of the pan when it’s time to slice them.

Place oats and salt into the food processor. Blend while adding the dates, a couple at a time until processed well. Mixture will still be dry.

Add peanut butter and vanilla. Continue to process for one to two minutes or until you achieve a big sticky mixture. If it’s too crumbly add a bit of water or more peanut butter

Warm your hands and press the mixture into a 8 x 8 pan lined with parchment paper .

Place in fridge or freezer while you prepare the top layer.

Top Layer (two options):

1 cup finely chopped cocoa butter

5 tbsp maple syrup

1/4 cup peanut butter

1/2 cup unsweetened cocoa powder

1 tsp vanilla extract (optional)

pinch of sea salt to sprinkle on top (optional)

Chop the cocoa butter. Place in a heatproof bowl set over a pot of simmering water. Add cocoa powder, peanut butter, maple syrup and vanilla. Stir occasionally.

When mixture is half way melted, remove from heat and continue to stir until everything is melted and well blended.

OR

1 cup finely chopped chocolate or chocolate chips

1/4 cup peanut butter

1 tsp vanilla extract (optional)

pinch of sea salt to sprinkle on top (optional)

Chop chocolate. Place in a heatproof bowl set over a pot of simmering water. Add peanut butter and vanilla. Stir occasionally.

When mixture is half melted, remove from heat and continue to stir until everything is melted and well blended.

Remove base from fridge. Pour on the melted chocolate and spread evenly with the back of a spoon or by tilting the pan from side to side to side to evenly distribute the chocolate. Sprinkle with sea salt.

Return to the fridge and let sit until slightly solidified but not so hard you can’t easily slice. When it’s time to cut, lift the squares from the pan and slice into bite-sized or large squares by pressing a warmed blade of a large knife down firmly and then dragging it back in a single motion.

Store in an air tight container in the fridge. I don’t know how long they will last because we eat them in a week or less. I imagine they will keep at least two weeks in the fridge and even longer in the freezer.

chocolate peanut butter squares, vegan

This and that by Suzanne

Here are five things that caught my attention lately:

1. these sponge toffee cliffs

20190216-IMG_7034.jpg

because I loved hiking them last week.

2. these handmade pottery bowls

20190302-DSCF6506.jpg

because they are so beautifully wabi sabi.

3. this feline friend

because he knows how to warm his bones first thing in the morning.

4. these shell remnants

20190303-DSCF6536.jpg

because they remind me of my beach combing nature.

5. these spring flowers

20190303-DSCF6529.jpg

Power truffles by Suzanne

natural+light+suzanne,+power+truffles-6402.jpg

These truffles are the perfect treat to satisfy your sweet tooth and nourish your body. They’re easy to make so long as you have food processor.

natural+light+suzanne,+power+truffles-6391_1.jpg
natural+light+suzanne,+power+truffles-6400_2.jpg
natural+light+suzanne,+power+truffles-6410_3.jpg

Power truffles (from The Living Kitchen)

1 1/2 cups pitted dates 

1 cup raw walnuts

1/2 cup raw sunflower seeds

1/2 cup raw cocoa powder

1/2 tsp cinnamon

pinch of sea salt

2 tbsp virgin coconut oil, softened

1-2 tbsp water, if necessary

1 cup unsweetened coconut


Put walnuts and sunflower seeds in food processor and blend until coarsely ground. Be careful not to over process or the mixture will become oily.

Add cocoa, cinnamon and salt and process some more.

Next, add coconut oil and dates and blend until a dough forms. 

If you need to, add water, a tablespoon at a time, until the mixture is blended well and sticky enough to form into balls.

Scoop mixture out by the tablespoon and form into balls.

Put coconut in a bowl and roll each ball in it until completely covered.

*Notes:

Make sure to use fresh walnuts. Sometimes run-of-the-mill grocery store walnuts are bitter.

You can lightly toast the coconut for extra flavour.

Store in an air tight container in the fridge for 2 weeks or in the freezer for 2 months.

natural+light+suzanne,+power+truffles-6330_1.jpg

Deseeding a pomegranate; embrace the mess, reap the rewards by Suzanne

Although revered and held sacred by many religions and cultures since ancient times, the pomegranate was never on my radar growing up in eastern Canada.

At some point, as pomegranates became more available in grocery stores in Canada, I started noticing them, particularly from September to January when the ones grown in California are in season. The more I saw whole pomegranates in the shops, the more I noted their sculptural appeal. A thick leathery peel in shades of red, pink, yellow, orange and purple. An odd shape, bumpy and uneven with a funny tiny crown at one end. The first time I picked one up I was surprised by the unexpected weight. Evidence, I would later discover, of hundreds of seeds inside.

Still, the pomegranate remained mysterious and unfamiliar. I knew nothing about its rich history and it would be years before I would finally taste one.

The pomegranate is one of the world’s oldest fruits, believed to have originated in Persia as far back as 2000 B.C. and has been the source of inspiration for cultures all over the world. It’s represented in Greek and Roman mythology, biblical texts, Chinese folktales and in the sacred writings of Islam, and the fruit of choice on Rosh Hashana. Some scholars still debate whether the apple in the Garden of Eden was in fact a pomegranate!

In the art world, the pomegranate is found in sculpture, architecture, stained glass, mosaics, ceramics and textiles and depicted in paintings - usually in the hands of the Virgin Mary, the infant Jesus or a Greek goddess.

The first time I tasted pomegranate was unforgettable. Someone served me a festive cocktail brightened with tiny ruby-red jewels. When I bit into one it released a wonderful sweet-sour juice in my mouth. Now the pomegranate really had my attention!

The seeds’ healing properties have been extolled since ancient times and current scientific research confirms their remarkable nutritional benefits. The seeds have high levels of antioxidants, are rich in vitamin C, K, B-complex and i…

When I finally broke open a pomegranate I was entranced. Inside, hundreds of tiny red seeds, separated and hiding in a waxy membrane and spongy white pith.

The seeds’ healing properties have been extolled since ancient times and current research confirms their remarkable nutritional benefits. Lately, they outshine blueberries in terms of super-food status. They’re high in levels of antioxidants, rich in vitamin C, K, B-complex and in minerals such as copper, calcium and potassium.

The seeds are very versatile. They add colour, flavour and texture to salad, cocktails, dessert, roasted vegetables and grain dishes. You can turn them into juice, eat them by the spoonful or sprinkle them on your morning oatmeal. You can even make pomegranate molasses.

DSCF6159_2.jpg
DSCF6252_3.jpg

Getting to those seeds can be a messy business if you don’t have a good technique. Here’s an excellent method to deseed a pomegranate:

  1. You need a knife, a large bowl and a wooden spoon.

  2. Pomegranate juice stains! Protect your clothing as if you were about to paint.

  3. Roll the pomegranate around to loosen the seeds from the peel.

  4. Score the peel around the middle of the fruit, horizontally, with a sharp knife. Do not cut through into the seeds.

  5. Gently break open into two halves.

  6. Hold half of the pomegranate, with the seeds facing down, over a large bowl and thwack the skin with a wooden spoon.

  7. Gently squeeze to encourage the release of the seeds from the white membrane as you continue to thwack.

  8. Remove remaining seeds with your fingers or a spoon.

  9. Remove any bits of pith from the bowl.

DSCF6150_1.jpg
DSCF6157_2.jpg

Store seeds in a container in the refrigerator for a few days or in the freezer.

To freeze, spread seeds in a single layer on a parchment-lined baking sheet. Place in the freezer, uncovered, for about two hours. Transfer seeds to an airtight container and return to freezer. They should keep for several months.

Whole pomegranates look beautiful in a bowl on a counter top and will keep like that for up to two weeks. Keep them in the refrigerator for a few months.

DSCF5947_3.jpg

This and that by Suzanne

Here are five things that caught my attention lately:

  1. this bed

DSCF5870.jpg

because I’m using bed clothes origami until I find a new duvet cover.

2. this cat grass

DSCF5877.jpg

because I have a thoughtful cat-loving friend who the sends me seeds.

3. this rose water

DSCF6170.jpg

because regular spritzing relieves my dried skin.

4. this juice made from tangerines, carrots, ginger and turmeric

DSCF6184.jpg

because I’m calling on all the elixirs to get me through winter.

5. these pomegranates

DSCF6029.jpg

because I have finally embraced the mess of seeding them.

Noticed elsewhere:

a passion for photographing cats.

sober musicians

this home

sumac wax candles

up-cycled fabrics

A spicy molasses cookie to nourish your soul by Suzanne

DSCF5625.jpg

I recently read about this exercise that asks you to make, draw or render a four-foot-tall totem pole of your life, including words, letters, maps, photos, objects, signs, etc.

I thought about it for a bit and decided a molasses cookie was an apt emblem for the warm and cozy parts of my childhood.

When I bake molasses cookies I’m transported. I’m a child standing on a chair at the kitchen counter helping my mother make a batch. When I smell them baking it’s as though I’m walking through the back door of our home on Janice Street and my mother is just pulling of sheet of them from the oven. The scent of cinnamon, cloves, ginger and nutmeg fills the air.

Funnily enough, in the early nineties I happened upon a cookie recipe not unlike the one my mother used. It came from an unlikely source - a 12th century medieval nun named Hildegarde of Bingen.

Hildegarde recommends you eat her spice cookies at least once a day to help lift melancholia, open your heart and bring you a sense of cheerfulness and joy. In particular, she credits nutmeg for the cookies’ positive effects. She writes,

Nutmeg has great heat and good moderation in its powers. If a person eats nutmeg, it will open up your heart, make your judgment free from obstruction and give you a good disposition. Take some nutmeg and an equal weight of cinnamon and a bit of cloves, and pulverize them. Then make small cakes with this and fine whole wheat flour and water. Eat them often. It will calm all bitterness of the heart and mind, open your heart and impaired senses, and make your mind cheerful. It purifies your senses and diminishes all harmful humors in you. It gives good liquid to your blood and makes you strong.”

DSCF5729.jpg

Here’s my updated version, a molasses cookie inspired by my mother and a 12th century mystic, spiced with cinnamon, cloves, ginger and nutmeg too. May the warm spicy goodness of these cookies help banish any gloom and elevate your mood in the days ahead.

DSCF5660.jpg

Spicy Molasses Cookies

1/4 cup coconut oil or butter

1/4 cup coconut sugar

1/4 cup cane sugar

I egg, slightly beaten

1/4 cup black strap molasses

1 cup spelt flour or all purpose flour

1 tsp baking soda

1/4 tsp salt

1 tsp ground cinnamon

1/2 tsp ground cloves

1 tbsp fresh ginger, finely chopped or grated OR 1 tsp dried ground ginger

1/2 tsp ground nutmeg, freshly ground if possible

extra sugar for rolling in (optional)

Preheat the oven to 350 degrees and line a baking sheet with parchment paper.

Cream the oil, coconut sugar and cane sugar until creamy. If using freshly grated ginger, add it here.

Add the beaten egg and molasses, and mix until combined well.

Mix the dry ingredients in a bowl.

Combine wet and dry.

Place the cookie dough in the fridge for at least 30 minutes or until the dough is easy to handle. It also helps to run your hands under cold water before rolling the cookie dough.

Roll equal sized portions of the dough into 1-inch balls.

Roll each ball in sugar to coat.

Place on the cookie sheet and flatten each ball with your hand or the bottom of a glass.

Bake for 10 minutes, until cookies begin to crack on top.

Remove and let cool.

Store in an airtight container.

Notes:

I baked this batch a little on the long side so they have a nice crunch without being too crunchy. If you want more chew than crunch, consider removing them from the oven just before they are finished baking and let them rest on the hot sheet for a couple more minutes.

If you don’t have any coconut sugar you can substitute regular sugar.

photos+57.jpg
IMG_6732.jpg

Amaryllis; a plant for the holiday and beyond by Suzanne

pretty potted red amaryllis  for the holidays

When I was growing up nothing said Christmas quite like a poinsettia. But for the last decade or longer the amaryllis is becoming equally, if not more popular. Here in Canada a big bright amaryllis is often the go-to plant to decorate homes this time of year.

In late November and early December amaryllis bulbs, potted and ready to bloom, are found in florists shops. Kits to grow your own - potting soil, a bulb and a plastic pot - start appearing in grocery, garden and hardware stores. Some of you might even find loose bulbs for sale and you can choose a bulb that looks promising, with the tip of the flower bud emerging from the bulb.

DSCF4703.jpg

Here are a few reasons why Amaryllis is a perfect plant to have inside your home this season:

Its willingness to produce beautiful blooms in the dead of winter. It’s fairly easy to coax this tropical plant to bloom. Soil isn’t even necessary and you can, as with paper whites, use water as your growing medium. The blooms, spectacular in size and available in many bold and bright colours, light up a room with ease. 

Amaryllis give you sculptural bang for your buck. A single bulb can produce a theatrical display with a cluster of trumpet-like flowers. You can watch the plant gracefully shape-shift as it grows. An amaryllis is beautiful at each stage of growth - when the bud first emerges from the bulb, when the blooms eventually unfold and everywhere in between. There’s always something splendid for the eye to behold.

IMG_9097.jpg

The blooms are long lasting. A bloom time of six to seven weeks means a bit of green and colour to carry us to the other side of the holidays, after the decorations have been cleared away.

Amaryllis flowers are beautiful no matter how you showcase them. Potted amaryllis still growing and on the verge of blooming look great on tabletops, windowsills, and easily at home amongst other holiday decor. Use amaryllis as a cut flower, too. When the bud first cracks open, cut the stem right above the bulb and place in water in a tall glass vase. Place on a coffee table near the tree. Mix a few amaryllis stems with other flowers and greenery and place in a beautiful urn for a theatrical holiday centrepiece.

How beautiful is this holiday bouquet featuring amaryllis by Bloomfields Flowers!

DSCF4852.jpg

An amaryllis bulb, already in bloom or on its way, makes a wonderful gift. And it’s the gift that can keep on giving, too, as long as you treat it right. Some folks toss the plant in the compost after it’s finished flowering but, with a regimen of care, an amaryllis bulb can reward you with blooms that get better with each passing year. For decades even!

DSCF5762X.jpg

This and that by Suzanne

Here are five things that caught my attention lately:

  1. these beautiful eggplants

DSCF4638.jpg

because they were almost too pretty to eat. almost.

2. these calendars

DSCF5122.jpg

because I designed them myself.

3. this magical place

DSCF4654.jpg

because it’s looking particularly exquisite this season.

4. these cotton bags

DSCF4622.jpg

because I love the lightweight and expandable design.

5. these candles

DSCF3648.jpg

Dark chocolate-covered cashew cherry balls by Suzanne

These easy to make no-bake balls are delicious and nutrient dense; made with ingredients high in vitamins and minerals and with flavours to please your tastebuds.

Especially noteworthy is the tart cherry flavour, which balances the sweetness of the dates and pairs beautifully with the dark chocolate coating, if you choose to go that route.

Make a double batch and store them in the fridge to have on hand as a snack or after dinner dessert. Packaged thoughtfully they make a great hostess gift.

DSCF4285.jpg

I used raw cashews but you could use roasted ones.

DSCF4189.jpg

Make sure you use sour dried cherries. These are Montmorency cherries.

DSCF4197.jpg

If your dates are dried out soak them for 10 minutes in warm water. Drain well before blending.

I was out of the much preferred finely shredded coconut and made do with dried coconut chips. To avoid a longer processing time, I coarsely blended the coconut chips first before adding the cashews.

DSCF4455.jpg

Melt the dark chocolate gently. I used a metal bowl sitting on a pot of simmering water. Make sure the base of the bowl does not sit in the water and that only the steam is melting the chocolate.

DSCF4471.jpg

Dark chocolate-covered cashew cherry balls

Makes 20 to 24 balls

12 medjool dates, pitted

1 cup dried tart cherries 

1 cup shredded coconut, unsweetened

1 1/2 cup cashews, raw or roasted

1 tsp almond or vanilla extract

pinch of fine sea salt

4 ounces dark chocolate, melted (optional)

Add dates to food processor and blend until broken up into little bits.

Add coconut, cashews, cherries, extract and salt.

Pulse and combine until a sticky dough is formed. Be careful not to over-process or the mixture will become oily.

Using a spoon, scoop out the mixture and carefully roll into 1 to 1 1/2 inch balls using the warmth of your hands to mold them. Place on a cookie sheet lined with parchment paper.

Pop the cookie sheet of balls in the fridge for 10 to 15 minutes or until firm.

Roughly chop the dark chocolate. Place in the top of a double boiler or in a heatproof bowl set over a pot of simmering water. Stir occasionally.

When the chocolate is half way melted, remove from heat and continue to stir until the remaining chocolate melts. 

Dip each ball into the melted chocolate and roll around until completely covered (I use a spoon). Lift out and return to the parchment lined sheet.

Return to fridge and allow the chocolate to harden.

Store balls in an air-tight container or large zip lock bag for up to two weeks. Place in the freezer for longer storage time.

Remove from fridge five minutes before eating, or longer if stored in the freezer.

DSCF4271.jpg

Fruit and berry crumble, vegan and gluten-free by Suzanne

fruit and berry crumble, vegan and gluten free

A fruit crumble is easy to make and requires these three things: a greased pan that’s just the right amount deep, a fruit filling and a crumbled topping. 

Wash, prep and coarsely chop fruit of your choice, combine with berries, flavour, toss directly into a greased baking dish and scatter the crumble on top.

You can choose any fruit or combination of fruit and berries from any season. It’s fun to experiment but you may have to adjust the recipe accordingly. My favourite as of late is apple, strawberry and cherry. You don’t have to use fresh berries either. Frozen works perfectly well.

Another great pairing is apple and peach. To try this combination, in the recipe below, substitute the cherries and strawberries for 4 peaches and only one tablespoon of tapioca.

I add tapioca to help thicken the filling, especially if I’m using frozen berries.

When baking, make sure the filling is visibly bubbling before pulling it out of the oven. This will ensure the thickener has been fully activated. If concerned about bubbling over in the oven, place your dish on a cookie sheet lined with parchment paper.

Please note, this recipe doesn’t call for sweetener in the fruit filling but you might reconsider and add a little depending on what fruit you use. For example, if you use rhubarb you will want to add a little extra.

fruit and berry crumble, vegan and gluten free

Fruit and berry crumble, vegan and gluten-free

For the filling:

1 cup frozen cherries

2 cups frozen strawberries

3 large or 5 medium size apples.

1/2 lemon, zest and juice

1/2 tsp cinnamon

1/4 tsp freshly ground nutmeg

1 -2 tbsp tapioca (optional)

For the topping:

2 cups large rolled oats

1/2 cup almond flour

1/4 cup honey or sweetener of your choice

1/2 cup coarsely chopped walnuts

3/4 cup coconut oil or olive oil (I use a combination of both)

1/2 tsp salt

Preheat the oven to 350 F

Lightly grease an approximately 9“ x 7” baking dish.

Peel, core and chop fruit into chunky pieces. 

Place fruit and berries in baking dish and sprinkle with cinnamon and freshly ground nutmeg.

Add the lemon zest, juice and tapioca. Lightly toss and allow sit for at least 10 minutes while you make the topping.

In a large bowl place almond flour, rolled oats, walnuts, sweetener and salt. Mix with a fork to combine. 

Add the oil (or butter) and continue to blend. 

Sprinkle crumble topping over the fruit. Try to work on a depth half that of the fruit. Too thick and the middle won't cook.

Press the topping down with your hands or the back of a large spoon.

Place in preheated oven and bake for 40-45 minutes or until golden and you can see the fruit bubbling through from underneath.

Remove from the oven and let stand for 5 minutes before serving.

fruit and berry crumble, vegan and gluten free

This and that by Suzanne

Here are five things that caught my attention lately:

  1. these apples

DSCF3178.jpg

because they were hand picked by a wonderful 17 year-old boy.

2. this smart packaging

DSCF3253.jpg

because it accepts refills.

3. these items for the mail

IMG_5572.jpg

because it’s a nice way to express thanks.

4. this house plant

DSCF3219.jpg

because it reminds me, always seek the light.

5. this fence

IMG_5596.jpg

Homemade chocolate peanut butter cups by Suzanne

If you’re a fan of chocolate peanut butter cups you will appreciate knowing it’s easy to make your own and tailor them to your specific preferences. 

I have only made these twice and I'm happy with the results even though there’s more tweaking I could do. For example, next time I will pour a little less chocolate in the bottom of each cup so the base is not quite as thick. 

Otherwise, the results are excellent.

DSCF3098.jpg

Here are tips to ensure your peanut butter cups turn out just the way you like them.:

I like to use dark chocolate but you may prefer milk or semi sweet chocolate. You can use chopped chocolate or chocolate chips. I’ve also included a recipe for you to make your own chocolate with cocoa butter, cocoa powder and maple syrup.

I use a natural peanut butter with no added ingredients. It’s runny so I thicken it with coconut flour to absorb the moisture. Depending on how thick or thin your brand of peanut butter is you can skip adding coconut flour. Or you may need a touch more or less than I use.

You could also use powdered sugar to thicken the peanut butter. If you use powdered sugar don’t add the maple syrup to the peanut butter filling and be selective about what type of chocolate you use. Perhaps one that’s less sweet.

I use silicon muffin tin liners that are 2 1/2 inches in diameter but you can use paper ones. You can also user a smaller size.

DSCF3142.jpg
DSCF3148.jpg

Chocolate Peanut Butter Cups

Makes 12 cups using 2 1/2 inch liners

Chocolate layer (two options):

1 cup finely chopped cocoa butter

3 to 5 tbsp maple syrup

1/4 cup peanut butter

1/2 cup unsweetened cocoa powder

1 tsp vanilla extract (optional)

pinch of sea salt

OR

1 3/4 cups (280 grams/10 ounces) dark chocolate, chopped

2 tablespoons coconut oil

Peanut butter filling:

3/4 cup peanut butter, creamy or crunchy 

2 tablespoons of maple syrup 

2 tablespoons coconut flour

salt to taste

Chop the cocoa butter. Place in a heatproof bowl set over a pot of simmering water. Add cocoa powder, peanut butter, maple syrup and vanilla. Stir occasionally. When mixture is half way melted, remove from heat and continue to stir until everything is melted and blended well.

OR

Melt the chocolate and coconut oil over a double boiler. Stir occasionally. When mixture is half way melted, remove from heat and continue to stir until everything is melted and blended well.

If using paper liners, insert into a muffin tin. Add equal amounts of melted chocolate to each cup and paint the inside of the liner with the melted chocolate - swish it around until it coats the sides, no more than halfway up the liner.

Place in the fridge to harden for 5 minutes.

Mix together the peanut butter, maple syrup, salt and coconut flour and stir until smooth. Let it sit for a couple minutes to firm up as the coconut flour will continue to absorb moisture with time. Add a touch more coconut flour if necessary. Or if it's too dry, add a touch more syrup. 

Add 1 generous tablespoon of peanut butter mixture to each cup. Press down to flatten. Cover the peanut butter with more melted chocolate and refrigerate for 15 to 20 minutes or until hardened.

Transfer to an airtight container. I store mine in the fridge and take out 5 minutes before eating.

DSCF3163.jpg

Tomato, corn and avocado salad by Suzanne

tomato, corn and avocado salad

This hearty salad is a feast for the eyes (all those colours!) as well as the appetite.

But before you get to enjoy it you must chop!

Maybe it’s a chore you dread and prefer to delegate. Or you might decide that chopping is part of the beauty of life. Using gorgeous fresh produce and a good sharp knife improves the chopping experience, too. I'm beginning to notice, when focussing on this simple task, a sort of peacefulness. 

tomato, corn and avocado salad

Serve this salad as a chunky guacamole with a large side bowl of corn chips or as a salad to accompany a main dish.

Throw in a can of rinsed black beans and you've got yourself a complete meal.

Tomato, corn and avocado salad

4 ears of corn (or the equivalent amount of cooked frozen corn, approx 2 cups)

4 ripe avocados, seeded, peeled, and 1/2-inch diced

4 tomatoes, 1/2-inch diced

8 green onion, thinly sliced or 1/2 cup diced red onion

1/2 cup freshly squeezed lime juice

1/4 cup chopped fresh coriander (or other herb of choice)

Salt and ground pepper to taste

Microwave the cobs in their husks for 3-4 minutes. Once cool, remove husks and chop the kernels off with the cobs lying on their sides. 

Chop remaining ingredients.

Gently toss the all the ingredients in a large bowl with lime juice, olive oil, salt and pepper, and chopped coriander.

Garnish with extra coriander. Squeeze a couple of sections of lime on the salad right before serving.

tomato, corn and avocado salad

Egg-stuffed tomatoes with pesto by Suzanne

DSCF2968.jpg

If you haven’t yet noticed I like recipes that are adaptable and versatile. This recipe works as a side dish, but if you double it you’ve got yourself a main course. Make this dish when you’re eating solo or need to serve a large crowd.

The recipe is easy to prepare but here are some important added tips:

If your tomatoes don't sit up right, slice the bottom tip off so they won’t roll around. 

Use large tomatoes, at least 3 inches in diameter.

Run a paring knife around the inner rim of the tomato, loosening up the flesh on the inside of the tomato. Use a small spoon and scoop out the flesh, juice and seeds. 

Don't waste the insides! Save them to make tabouli. Or blend with a little garlic and onion and mix into your pasta sauce.

Use store-bought pesto or make your own. Alternatively,  season the insides of the tomatoes with oregano, pepper and a little olive oil.

Don't fret about overflow. Some egg white might end up on the bottom of the baking sheet but don't let it bother you, although I suggest you line your baking dish with parchment for an easy clean up. 

I topped mine with crumbled goat feta and cracked black pepper. But any grated cheese will work as would bread crumbs, chopped parsley or green onion.

Egg-stuffed tomatoes with pesto

Adapted from this recipe.

Large tomatoes

Pesto

Eggs

Salt and pepper

Cheese for topping

Preheat oven to 350 F

Brush an oven proof dish with olive oil or line with parchment paper.

Cut the tops off the tomatoes and scoop out the seeds and flesh.

Sprinkle the insides with a little salt and place upside down on paper towel for 10 minutes to drain.

Place the tomatoes in the prepared dish. 

Put a spoonful of pesto inside each tomato or season the insides with oregano, pepper and a little olive oil.

Break an egg into each tomato. Add topping of your choice (grated cheese, crumbled feta, bread crumbs).

Bake for 25 minutes, or for less time if you want your eggs runny.

Garnish with parsley (optional) and serve.

DSCF2957.jpg
DSCF2961.jpg
DSCF2969.jpg

Glebe House Tour 2018, sneak peek by Suzanne

DSCF2684.jpg

If you're in or near Ottawa on Sunday, September 16th you should buy a ticket and come on the Glebe House Tour. What a way to spend a Sunday afternoon; strolling around a beautiful historic neighbourhood, exploring the interiors of five private homes. There's even a complimentary Tea Service afterwards at the local community centre.

We're in final stages of planning and things are coming together nicely. In fact, the ticket (also a booklet to guide you as you tour) is ready for the printer! 

Throughout May and June a few of us (members of a committee of 11) visited each home to get to know the homeowners and gather information. I captured each home in pixels, while Stephanie summed them up in words.

Here's a glimpse of what's in store:

DSCF1410.jpg
DSCF1415.jpg

One of the owners of this home is a self-described garage sale fanatic with a knack for spotting hidden treasures and giving them new life. Vibrant colours throughout this home are inspired partly by time spent living in Mexico. Note the charming three-season porches on both the left and right sides of the house — perfect for relaxing and watching the world go by.

DSCF1534.jpg
DSCF1559.jpg

The owners of this home fell instantly in love with the soaring ceilings and peaceful setting of this hidden jewel overlooking Brown's Inlet. Natural light plays off Venetian plaster walls to create a gorgeous backdrop for a stunning collection of art and furniture. The kitchen features a beautiful backsplash and heated slate floors. The luxurious master retreat opens onto a terrace overlooking the inlet.  

download.jpeg
DSCF1612.jpg

From the heated driveway to the master ensuite, the renovations to this gracious home focused on making it comfortable and maintenance-free for an active, retired life. The entire home is lovely - with an impressive collection of art and furniture, some pieces which were custom-made to go with cherished family heirlooms. A real show-stopper is the three-season room and deck off the second floor — a cottage getaway with the comforts of home.  

DSCF1484.jpg
DSCF1518.jpg

This lovely home features an addition that flows seamlessly from the original part of the house. Rather than stored away out of sight, family photos, mementos and heirlooms are beautifully curated and on display throughout the home, as is an amazing art collection. Be sure to allow time to enjoy the gorgeous multi-level garden.

DSCF2081.jpg
DSCF2040.jpg

In renovating this grand old home, the homeowners respected the original footprint but gutted and rebuilt the interior with a contemporary take on traditional style. The result is gorgeous. White oak floors add to the home's bright, airy feeling, while the chevron pattern adds visual interest. In the kitchen, doors that appear to form part of a seamless wall of cabinets actually lead to an office and to the basement. 

This and that by Suzanne

Here are five things that caught my attention lately:

1. this homemade yogurt

because it's made with almonds by my friend and neighbour.

2. this cake

cake decorated with flowers

because decorating with berries and flowers is my new thing.

3. this chamomile

DSCF2336.jpg

because it's homegrown and handpicked.

4. these petals

DSCF2476.jpg

because I have specific plans for them.

5. these aromatic leaves

DSCF2351.jpg

How to move a peony bush without upsetting the fairies by Suzanne

DSCF1894.jpg

I’m excited about our backyard make-over but nervous about the fate of two spectacular peony bushes.

I need to move them before yard work begins. But peony plants, especially mature ones like the ones in our yard, don’t like to be moved. Autumn, when peonies are entering dormancy, is the ideal time to do it but I can’t wait until then. 

DSCF1728.jpg
DSCF1714.jpg

In the Victorian age it was considered unlucky to dig up a peony bush. If you did the fairies would curse you. 

I don’t want to upset the fairies or invite curses and yet I’m determined to save the peonies before yard work begins, even though the odds of a successful transplant - a plant that continue to bloom - aren’t necessarily in my favour.

DSCF1827.jpg
DSCF1882.jpg
DSCF1899.jpg
DSCF1900.jpg

The time for transplanting may not be ideal but there are factors I have control over, which might make the move less traumatic. 

When it’s time to dig up the bush dig as wide and as deep as possible to minimize disturbance.  It’s a challenge to transplant a mature peony without causing root damage so i plan to proceed respectfully,

Replant as quickly as possible and in a sunny location, taking care to replant no deeper than they were growing before. The more shallow the better.

A little added compost will help.

download.jpeg
DSCF1967.jpg
DSCF1910.jpg
DSCF1873.jpg

Even if all goes well the peonies might be resentful; it's normal to lose a couple of seasons of blooms after a transplant.  

It might be awhile before these bushes flower again and, since peony season is so fleeting, here are a few tips to help you really enjoy these elegant blooms while they’re here:

Bring them inside and place them in single stem vases or in bunches in larger vases.

Cut the buds before they’ve fully opened but after they’ve started to crack.

Give stems an angle cut.

The more foliage you strip off before you put them in water, the more the water will hydrate the flower heads and cause them to open quickly. 

Ants love the sticky syrup that appears on the buds. They usually parade off but if the ants haven’t left and you want to bring cut flowers inside, cut the stems and place the flowers in a water-filled vase, place it in the shade and leave outside overnight. The ants should vacate and then you can bring the flowers inside without bringing the ants in, too.

Peony blooms dry beautifully. Attach a rubber band around each stem or bunch and hang flowers upside down. Allow to dry for one to two weeks or until they are no longer limp when turned right side up.

DSCF1987.jpg
DSCF1855.jpg
DSCF1907.jpg
DSCF1848.jpg
DSCF1943.jpg
download.jpeg

Chocolate layer cake with ganache and mashed raspberries, grain-free, dairy-free and refined sugar-free by Suzanne

DSCF1737.jpg

Even if you're grain, dairy and refined sugar averse you can still bake a delicious chocolate layer cake and eat it too.

For me this cake is the perfect amount of sweet. But, then again, I'm someone who tends to decrease the amount of sweetener called for in dessert recipes. The batter is sweetened with maple syrup and the ganache with big soft medjool dates and a wee bit of maple syrup. So feel free to increase both if your palate demands more sweetness.

This is a two layer version made with seven inch pans but you could do a triple layer with smaller pans.

Added bonus: this cake freezes beautifully. I warm a frozen slice in the microwave for about 45 seconds. It reminds me a bit of those chocolate molten cakes. Delicious!

Inspired by this recipe.

DSCF1742.jpg
DSCF1685.jpg
DSCF1756.jpg

Cake:

3 cups almond meal

1/3 cup cocoa

1 tsp baking soda

1 tsp sea salt

3 eggs

3/4 cup maple syrup

3/4 cup water

1 tbsp vanilla extract

Preheat oven to 350 degrees.

Prepare two 6 or 7 inch pans by greasing and lining with parchment paper.

In a bowl, combine the almond meal, cocoa, baking soda and sea salt.

Combine eggs, maple syrup, water and vanilla extract, and add to dry mixture. Stir.

Pour batter into prepared pans.

Bake for 25 minutes or until tooth pic inserted in the centre of the cake comes out clean.

Allow to cool before icing with ganache and topping cake with raspberry sauce.


Ganache:

4 oz 100% cocoa baking chocolate

4 tablespoons coconut oil (melted)

2 tablespoons maple syrup

1 cup coconut milk

9 pitted medjool dates

Over very low heat or in a double boiler melt coconut oil and baking chocolate. Once melted, remove from heat. Add to blender along with coconut milk, maple syrup and dates. Blend until consistency is smooth. Allow to chill in fridge until it becomes thick enough to spread (about 20 to 30 minutes.)

Raspberry sauce:

Mash 2 cups raspberries, add 2 tablespoons maple syrup and 2 tablespoons lemon juice.

Cook over low heat for 25 minutes.

Allow to cool; spread evenly on top of iced cake. Top with raspberries.

DSCF1769.jpg

This and that by Suzanne

Here are five things that caught my attention lately:

1. this method of seed starting.

DSCF1125.jpg

because eggshells are biodegradable, the perfect size and can be planted directly into the soil after being cracked a little.

2. these purple harbingers of spring

DSCF1360.jpg

because they're here for such a short time.

3. this beauty

DSCF1140.jpg

because I'm plant sitting until the end of summer.

4. this simple solution to increased well being

DSCF1404.jpg

because pure celery juice is delicious and most definitely underrated.

5. this breakfast for one

DSCF1408.jpg

because saving leftover batter from three days ago was a good idea.

Noticed elsewhere:

time for a new one or two.

animal comfort.

good for your teeth and the earth.

the quest for happiness can do more harm than good.

serving plates as light as leaves.

taking risks.

How to get the most from a bouquet of flowers by Suzanne

Flowers are the pets of the plant world. Like pets, they help reduce stress and make me feel good.

DSCF1137.jpg
DSCF1126.jpg

Inspired by this beautiful bouquet from Bloomfields Flowers here are some ways to get maximum enjoyment from your floral bouquet.

Never allow a beautiful bouquet to sit alone and under appreciated in a room. Move it to the room where you will be spending the most time. I moved this bouquet from the dining table, to the computer table, to the kitchen counter while I prepared dinner, and then back to the table while we ate. I might even bring it to the bedroom and place it next to my bed so I see it first thing in the morning. 

If it's a bouquet with blooms galore, snag a few individual stems from the bunch and place each in a vase of its own. Scatter these wee arrangements about your home. That way they greet you no matter where you turn.

If a bloom gets accidentally knocked off, don't despair. Let it live out its final days floating in a bowl of water on your coffee table. 

DSCF1166.jpg
DSCF1226.jpg
DSCF1198.jpg
download.jpeg
DSCF1159.jpg